Sunday, December 8, 2013

A Sweet Freebie Just for You

I know. I know. I am so crazy behind on blogging. Honestly, I have so much so share with all you that I am quite overwhelmed. There are so many awesome things happening in my classroom this year! And also some new challenges that I am working my way through, which is a lot of the reason I am behind in blogging. Plus, my daughter is a freshman in high school this year and joined the cross country team. Cross country runners keep an INSANE schedule! But, now cross country season is over, and my son's soccer is in between seasons, so my hope is that I can get back on track blogging about some great ideas of activities and teaching that you could use in your classroom as well.

For now, please accept my apologies... and this SWEET freebie! I do a gingerbread theme in my classroom for December. You see, I teach the ESL fourth graders at my school, and many of them do not celebrate Christmas. I always want to do Christmas activities, while still allowing everyone to participate. My solution has been The Gingerbread Man... Christmas-ey without being specifically Christmas. I even have a freebie in my store of some gingerbread activities I do. Anyway, I was perusing Pinterest looking for gifts for my students and came across this cutie pie wrapped around a Hershey candy bar:


Well, I am always looking for ways to simplify as well. That guy was cute, but also looked like a lot of work. So, I decided to design some Gingerbread Candy Wrappers. They just need to be printed, cute, wrapped around a candy bar, and taped. And I have specifically designed them generically, so they will work for students both do and don't celebrate Christmas.


So, feel free to grab this forever freebie for your student gifts this year, or wait and use it next year.

Friday, November 29, 2013

Big Savings at the Teachers Pay Teachers Cyber Monday Sale

Who doesn't love a sale, especially this time of year. And one you don't even need to leave the house for? Even better. Just enter the code "CYBER" at checkout to get an extra discount off stores that are already on sale... like mine! Every item in my store will be on sale at 20% off. That, plus the code, will give you 28% off! 28% off emergency sub plans, writing resources, and downtime ideas!


So many of your favorite sellers will have their stores on sale too. Now is the time to buy all those fantastic resources you have saved in your Wish List. And spend this weekend finding awesome things to add to that Wish List before you buy. Find something you just can't do without? Feel free to share the link in the comments section so everyone can get in on the action.

Monday, August 19, 2013

Classroom Reveal


Yay! My classroom is finally mostly set up! I still have some details to finish, but the big pieces are all in place. Now, keep in mind that I am no Schoolgirl Style, but my mother does have an interior design degree, and every now and then I channel her just a little.

When I was hired a week and a half after the start of school last year, I was most grateful to walk into an already set-up room even though it was not "me" at all.  It was not bright colors and was very plain. This was it last year:

And here is what I started with this year. I took down all that red and brown in preparation of beach-ifying my room.


I started with that back wall. I used fadeless paper I bought at Lakeshore... I got one roll in lime green and another that was an ocean pattern. That ocean one was a steal... one roll did all that you see in the photos, and I still have some left over! For my borders, I used a combination of waves and sea animals. On the left of that back wall are my math posters. The top right has reading genre posters.

That part in the bottom middle is from the book Super Grammar. You should totally check out the author's blog. He has those free posters. It's pretty cool!


And here is my guided reading table and information board. It has the calendar, lunch count, agenda, and my favorite subject flip flops to post our daily objectives.


The front of the room needed some more beach, so I added wave border to the top of the board and some beachy accents of the hula skirt and sea animal cut outs.

Here is more of a close up on the Elmo area... I made some morning and afternoon procedure posters that I hung there.

The classroom library got organized by my teenage daughter. It seems they are quite useful occasionally. Ha!

This is my Leader in Me tree poster on the door to my closet and my behavior clip chart. Below it, I have the pencil sharpener and the buckets for sharp and dull pencil. On the shelves, I keep paper, white boards, markers, erasers, and the math kits.


I ended up with a blank wall, so I decided to "science" it up by adding some photographs I took during our Florida Keys vacation. They go with our science curriculum too.


These are my rotation turtles to keep track of what special class we have each day. It is a student's job to change it at the end of each day.


Even my closet is sort of organized to start the year. We'll see how long that lasts.


So, finally, for the whole effect, here is what you see when you stand at my door. Is it perfect? No. Do I love it? Yes!


Saturday, August 17, 2013

Back to School Sale


I know many of you are already back at school, but Teachers Pay Teachers and most sellers want to help you get the resources you need. The annual Back to School Sale is August 18 and 19. Everything in my store (plus many other fabulous stores) will be 20% off plus, enter the code BTS13 at check out to get an extra 10% off. That's a total of 28% off at most stores!

I start on Monday for a week of inservice with students starting on August 26, so it's pretty good timing for me. Although I have been buying resources all summer long, I managed to find more for my shopping cart. Imagine that, right?!?! Here's a peek at what's in my cart:
Usually I try to save the higher priced items for a sale:
First there's the 4th Grade TEKS "I Can" Statements Bundle from 4MulaFun. I teach 4th grade in Texas, so this is perfect... all four care subjects with all the objectives in one bundle. Just what I need to help students be accountable and know what they should be learning.

Next there's the 4th Grade Interactive Reading Notebook from Nicole Shelby. This one is aligned to the Common Core, which we don't use in Texas, but much of it applies anyway. It has easy-to-follow instructions as well as photos of actual notebook pages. I do love photos! And if you are a 4th grade teacher, you should definitely check out Nicole's store.

Third in my cart is Texas Indians an Integrated Unit from Educating Everyone 4 Life. Fourth grade is where we teach this subject, and integration is always a good thing... especially for my ESL sweetie pies. Plus, social studies resources are always pretty hard to come by.

Next are the Newsletter Templates in a Fun Beach Theme from MsFultzsCorner. There are 12 included, one for each month, and with my beach-themed classroom this year, these were a must-buy! Plus, Christi Fultz is the bomb!!!

Finally, I had to include an item from my go-to fourth grade seller, Jennifer Runde of Runde's Room. I can't believe I didn't already own her Interactive Math Journal, but that is going to be remedied soon. 165 pages of math journal ideas with all major math concepts covered. It's a must-have if you teach math to older kiddos!

So, that's what's in my cart. What other amazing things can you find to benefit yourself and your kiddos?

Monday, August 12, 2013

Writing Workshop Teacher Toolbox

 I wrote earlier in the summer about going to a three-week writing institute and being apprehensive about it. Well, I went, and IT WAS AWESOME!!!!! Wow! It was basically a mini graduate-level class complete with two textbooks, all of which was provided by my district. The training was based in the New Jersey Writing Project and was all about how to launch and implement writing workshop in the elementary classroom. And how did we learn? By going through writing workshop ourselves! It was so cool... a lot of work... but so beneficial. 

You know those days when students sit there and refuse to write anything? I had those. You know those students who "don't know what to write about"? That was me. You know those students who think they are done, but they are no where close? Yep, you got. I did that too. It was so valuable to be able to be in my students' shoes. When school starts in a couple of weeks, and I launch writing workshop with my own fourth graders, I can tell them I know exactly what they are thinking, feeling, and going through... because I was there.

Yes, we wrote... every day. And we had to produce two finished pieces... a personal narrative for publishing in our class anthology, and an extensive piece that we were to submit for publication to a real magazine.

And I got so many ideas for the classroom... from prewriting strategies to grouping to mini lessons to revising to editing. I will post on them as I use them with my kiddos. For now, I thought I would focus on getting things started so I created a new product. It's my first new product in like... FOREVER! 

I created the Writing Workshop Teacher Toolbox, a set of six forms to use in writing workshop. Also included is a list of procedure mini lessons to teach at the launch of writing workshop. Forms included are:
• Mentor Text Chart
• Baseline Sample Analysis Form
• What We Are Working On Form
• I'm Ready for a Conference
• Conferencing Form
• Comments from the Reader

Here are a few sample images of a few of the forms:


Since these forms are intended to be used by the teacher, they are good for all grade levels. I will using them with my students, and I hope you can use them with yours too.

And stay tuned for more tales from the writing workshop this year.

Thursday, August 1, 2013

Currently in August

Oh boy! I am so excited I finally got off my butt and am joining in Oh Boy 4th Grade's monthly Currently linky party! I see it all the time and love it, but I have never linked up. There's a first time for everything! And I am sure this won't be my last time either.

I can't believe it's August already... and this August for me is so different from a year ago when I didn't have a job and desperately wanted one. Wow, I would have put way different responses on these last year. But now is now! And it is good! And all I want is to get into my classroom and get started!

This year I have also decided that I will be doing Oh Boy 4th Grade's Currently for Your Classroom with my students. You see, we are a Leader in Me school, and I thought Currently would be a perfect addition for their data notebooks. How fun to have a year's worth of responses to see how they changed! Plus, you never know when something like this might spark a great writing idea! I already have them printed and ready to be copied for my new sweeties whom I haven't even met yet!

So, here's to setting up classroom, finding the rug of my dreams, and drowning myself in chocolate!

Tuesday, July 16, 2013

Get Your Followers Only Freebie Pack from a Class*y Collaboration

Woo hoo! Look at this fabulous collaboration project I am involved in. I part of a brand new blogging collaboration of 12 bloggers... a Class*y Collaboration. We have gotten together because we just have to share more ideas, more activities, and more freebies!


To start things off with a bang, we are offering an everybody-wins giveaway. All you have to do is follow is on Bloglovin. Just follow the directions on the blog post and you will get an amazing Follower-Only Freebie Pack. A sample of the super-duper free resources are there for you to check out. So don't wait! And share with your friends so they can get in on the freebie action too!
Plus... one lucky follower will get a $50 winner's choice gift card. Hmmmm.... wonder if contributors are eligible to enter? Guess not! Ha!

Wednesday, July 3, 2013

What Am I Doing This Summer To Prepare for School?


Today I am linking up with my good buddy in the blog world and in real life, Lorraine from Fabulous Fourth Grade Froggies. As much as I don't really want to think about all the things on my summer to-do list, I do like her idea of recording them all in one place. And it's not even that I'm not excited for school. I am crazy excited! This is the first summer I am actually getting to plan for a classroom that I know is mine. Truth be told, I am probably going just a wee bit overboard. My list ranges from a three-week professional development to shopping, shopping, and more shopping to crafting to planning to organizing and purging. I'm sure a lot of it probably sounds pretty familiar to you.

1. Professional Development. Most teachers do PD in the summer, but I made the commitment to do a three-week writing institute. I teach 4th grade, and that is the grade where writing is tested in elementary school here in Texas. This institute is based on the New Jersey Writing Project, and I hear it's supposed to be great! So, although I am sad it's three weeks of my summer gone, I am also excited about writing! Additionally, I have a one-day ESL workshop scheduled in August.

2. Shopping! When I took my teaching job, it was a week and a half into school. I was super duper lucky to basically inherit a put together classroom since the teacher was leaving the classroom to go to a specialist position. I didn't have the time or energy then to decorate things my way so I just adapted and added some things as the year went on. Now, though, I am chomping at the bit to build my own room. I have chosen a beach/ocean theme and have already been doing quite a bit of shopping from Lakeshore, Really Good Stuff, and Wal-Mart so far. Here are a few of the things I have already bought:


3. More Shopping! This time on Teachers Pay Teachers. And along with that shopping comes the printing and organizing of the materials. Here is my favorite TpT purchase so far. It's one the the Teacher and Lesson Planners from April at A Modern Teacher. I printed mine on my home printer and put it in a 1/2-inch binder. Now, I am ready to stay organized!


4. Crafting. I wouldn't say I am the ultimate crafter, but I enjoy a simple project now and then. So, I am making these flip flop agenda subject labels. They are just Michael's cheapo flip flops with magnets hot glued to the back, and laminated labels taped on the front.


Going along with my beach theme, I am embracing the seashell. I have hot glued them to craft sticks and magnets that will also get student numbers. Plus I made a few larger shell magnets just for teacher use.


5. Planning. Before school let out in June, I was already beginning to plan my room arrangement for next year. I still have to finalize that. And, of course, all the curriculum and back-to-school, get-to-know-you, team-building activities. The nice thing about that one is that my fabulous principal has made our retreat day in August a team planning day.

6. Organizing and Purging. Finally, when I was looking for a job for four years and subbing, I hoarded everything I came across. I had no idea what grade I would end up in or what I would need, so I saved it all. Now I have a garage full of teaching mess! I am in the process of cleaning through all that so I can save what will be actually useful and be able to take it to my classroom.

Friday, June 28, 2013

Bloglovin Shows Blogs Some Love

When I heard Google Reader was going away, I had a little freak-out moment since that's how I follow and read all my favorite blogs. After the panic subsided, I launched a search for a new way to keep up. Cue the discovery of Bloglovin. Now, I only just signed up so I don't really have any grounds to compare it to Google Reader, but other blog-lovers seem to (that's right; you guessed it) love it. To make sure you don't miss any of your favorite blogs, go check out Bloglovin for yourself. You get an option to import all your blogs from Google Reader. Definitely do that, but also make sure to click this link to follow Learning To Teach in the Rain. That way you won't miss any of our rain dances together. Follow my blog with Bloglovin


Tuesday, June 25, 2013

Creating a Classroom Newspaper: Part 3 of 3


Yay! We're almost there. We've got the classroom newspaper planned and the stories written, edited, and typed. Now, we just need to finish things up.

Day 16: Creating a Dummy. For those who don't know, a dummy is just a representation of what stories will go on what pages. My students sure got a kick out of the fact that it is called a dummy. :-) I created ours on the board with the anchor chart of stories at hand. As a class, we decided what order the sections would go in, and what stories would go on each page.


**Now here is the part where I did take a short cut. I did the layout in the computer myself. Our computer lab at school had already closed for the year, and we were just running out of days in the school year. I used Adobe InDesign and created my own newspaper template, but I have experience doing that. It would work just as well to use one of the premade newsletter templates in Publisher or whatever program you and your students are comfortable in.

Day 17: Proofing. I printed all the pages out and made enough copies so every student had at least one page. I let them loose with highlighters and red pens and told them to mark everything they saw that was wrong or that they wanted to change. Then they traded papers and did the same thing. We did this a few more times, so that each student saw at least 4-5 pages of the paper. I took those marked up copies, made the corrections, and printed out a clean copy.

Day 18: Distribution Discussion. This was a class discussion deciding who we were going to give copies of our classroom newspaper to. I reminded the students about the kinds of people who would want to read the paper. The final list included: the students in my class, the other three fourth grade teachers, the principal, the vice principal, anyone who had a story about them in the paper (this included the specialists, student council sponsor, etc.), the special ed teachers (since we had two special ed students in our class), our language support specialist (I had 12 ESL students who saw her on a regular basis), the reading specialist, and the counselor... all total it was about 50ish copies.

**For printing, I just used the handy dandy copier, printed front to back and stapled to create our finished classroom newspaper.

Day 19: Delivery. This was a very quick day. I sent my students in pairs to deliver to a couple of recipients at a time. As email after email came in praising the kiddos for their newspaper, I made sure to share all the positive responses with them. All the students were so excited to see their work in print and to have so many people give them compliments. In fact, the biggest complaint came from people who were not on the distribution list. Next time, I guess we'll make more copies.

Thursday, June 20, 2013

Creating a Classroom Newspaper: Part 2 of 3

In Part 1 of this series of posts, I recounted how I led students through the planning process of creating a classroom newspaper. Now, it's on to the writing of the stories. When last we met, students had named the newspaper, decided on all the stories that would be in the paper, and chosen a story idea to write themselves. Additionally, I had also conducted lessons in the parts of a newspaper and how to write a newspaper story in an inverted pyramid style. Now, on to the writing... let's start with prewriting.

Days 6-7: What Do You Know and Need to Know. Since newspaper writing is a kind of informational text writing, it all starts with the 5 W's (and H). It's all about the facts. This was also another nice opportunity to reinforce the difference between facts and opinions. I spoke about journalistic ethics, and how writers should not write something if it is not a fact. I know. I know. Many journalists have thrown that part out the window these days, but we can certainly teach the ideal, right? I had my students just draw this graphic organizer in their Writer's Workshop notebooks, but I have also created a Newspaper Article Prewriting Graphic Organizer freebie that you are welcome to use to do just this.

Then students were to begin filling in the graphic organizer with all the facts they knew. Any holes in the graphic organizer became questions to go at the bottom of the organizer. Finally, students were to write down who could answer those questions for them. That gave them the names of who they would need to interview. It took most students about two class times to complete this form and generate a good list of questions.

Days 8-9: Conducting Interviews. Before I set the students loose to conduct their interviews, I went over some etiquette rules. I wanted to make sure they weren't just going to barge into someone's classroom and start attacking them with questions. I also gave the teachers the heads up that one of my students would be coming. I went over how to politely ask the questions and how to write down their answers. Many of my students just needed to ask other students questions or interview me, so we really didn't disturb too many teachers for too long.

Days 10-12: Writing the Rough Draft. Once students had all their information, I reviewed the inverted pyramid structure (from the Jack and Jill lesson). In this structure, facts are written in a story in the order of importance, not sequential order like most students are used to writing. The reason this is the case is that most newspaper readers don't ever finish a story. I emphasized to the students that their job when writing was to make the headline interesting enough that a reader would want to read the lead (or introduction). And then they had to make the lead interesting enough that a reader would want to keep reading. And finally, they need to put all the really important facts at the top of the story so the reader got the big ideas before they stopped reading.

Days 13-14: Self and Peer Editing and Editor Approval. Once their rough draft was complete, the students were to self-edit their writing. Then they were to exchange stories with a peer and edit each other's writing as well. Finally, they needed to get the approval of the editor-in-chief (me).

Day 15: Typing the Stories. I scheduled a day in the computer lab when most everyone was done with their stories. I had the students all type their stories with a headline and their byline into Microsoft Word.

Of course, there were some students who worked through this process faster than others. That's where the extra submissions opportunities came into play. I told students, once their story was complete, they could work on additional items for the paper. I gave them choices of writing an opinion story, creating ads (on paper or in the computer), illustrating their story, drawing and writing a comic, or creating a game such as a word search or crossword. It all ended up working out pretty well, and the students were generally busy the whole time we were working on the classroom newspaper.

The last blog post discussing creating classroom newspapers will hit on laying out the newspaper, proofing, printing, and distributing.

Saturday, June 15, 2013

Creating a Classroom Newspaper: Part 1 of 3

After our onslaught of state-mandated testing was over, I wanted to start a classroom project the students could really take ownership of. As a former newspaper journalist, my thoughts naturally went to writing and a classroom newspaper. Additionally, I thought it could be a perfect way to publish student writing and also reflect on the school year. It was decided... a classroom newspaper it was. I will detail my process in a series of three blog posts: the planning, the writing, and printing/delivery.

To get things started, I started looking around doing some research and remembered a resource I had found when I was student teaching. I also did a classroom newspaper in my second grade student teaching classroom as a part of our nonfiction writing unit. I came across this fabulous resource from Read Write Think, the website of the International Reading Association and the National Council of Teachers of English. By the way, if you have not discovered Read Write Think, you need to spend some time exploring this invaluable resource. I have found so many amazing lesson plans, units, online activities, and others, complete with printables and everything! Seriously, it's the bom diggity!

I combined the Read Write Think unit with my own knowledge of journalism and started the project in the classroom. I began with getting my students familiar with newspapers. For homework, I had each student bring in a newspaper article of their choice. To make things easier, I told them it could be from any newspaper source, including online papers. I showed a few examples of what I was looking for to make sure they understood the assignment. I also brought in my own stack of whole newspaper examples. I happened to still have many of my own papers with my bylines that the students got a big kick out of, but you could bring in any example.

Day 1: Parts and Vocabulary of a Newspaper. Using the articles brought in be the students and my examples papers, I had the students look through the papers. I recorded their observations on a bubble map on the board. This gave me the opportunity to introduce vocabulary like headlines, bylines, captions, etc. as well as point out the different parts like news, sports, opinion, comics, ads, etc. We then discussed what parts we thought our newspaper should have. I made a list of those things on an anchor chart and hung that up when we were done.

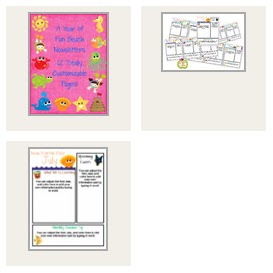
Day 2: Naming the Newspaper. Every paper has to have a name, so I let the students decide the name of ours. I brought out the example papers again and pointed out the different words commonly used in newspaper names, like times, news, journal, today, dispatch, etc. I gave the students some time to brainstorm their suggestions, and then made a list of all of them on the board. We ended up with about 10 suggestions. I let the students vote on their favorite to narrow the list to the top three. Then we voted again and settled on Friedrich's Fabulous Times.

Day 3: How to Write a Newspaper Story. This is where I used the Read Write Think unit the most. Basically I used Session 2 nearly word for word. I explained how newspapers stories are written in an inverted pyramid style with the most important information first and include all 5 W's. Then we looked at Jack and Jill. We identified the 5 W's in the nursery rhyme, and then did a shared writing activity to create a newspaper-style story telling the saga of Jack and Jill.

Day 4: Story Ideas. This day I ran much like an actual meeting is held at a real newspaper. I began a list of suggested stories that the students wanted to see in the paper. The important part here was to include every idea the students suggest. We ended this day with my telling the students to be thinking of the top three stories they would like to write. We also began discussing which section of the newspaper the different stories would go in.

Day 5: Story Assignments and Final Planning. I told the students that each of them was responsible for at least one story. Then they could choose one other thing to submit, such as an ad, picture, comic, or game. Here is where I let students choose what stories they were most interested in writing. If there were two or more students wanting the same story, we discussed who we thought would be better. For example, someone who was in choir was probably better equipped to write the story on choir. Eventually, I had to call on some students who hadn't volunteered and have them choose from the remaining stories. Then we made our final section list of all the stories to be included and who the writer was for each. In this part of the process, some of the stories did not get chosen. I opened that up to the students if we were OK that those stories were not in, or if someone wanted to write a second story. All of this was recorded on another anchor chart, and also hung so everyone would know their responsibilities and where their story belonged.

Basically, at the end of the first week of this class project, we had the name of our newspaper and a plan for who was going to write what story in what section. Stay tuned for Creating a Classroom Newspaper: Part 2 of 3 where I explain how I walked the students through the actual writing of the stories.